Your back can be made more vulnerable to injuries if your job requires you to sit for long periods of time. This causes your hamstrings to shorten and pulls on the pelvis to impact the middle and lower back muscles, which increases the potential for shoulder, lower and middle back injury if the wrong stress comes along. One of the beautiful things about the hyperextension with dumbbell lateral raise is that almost every fiber in the back is activated in this exercise while also activating the hamstrings along the way.
This exercise will help your posture, strengthen your lower and middle back, and improve the quality of your entire upper body. Not only will your back look great from your hips to your neck, your back strength will protect you and reduce the chance of ever getting a back injury. You will find the isometric contractions in the lower back tough at first, but soon you will see a real difference.
Hyperextension of the vertebrae occurs when the extension goes beyond the point where the spine is in a straight line with the hip. Generally, excessive “hyper” in back extension exercises should be avoided because this can compress the vertebral disks and the nerves that exit between the vertebrae. However, the extension part of the exercise will activate all of the muscles along the spine.
Proper Exercise Form
1. Lie face down on a hyperextension bench. Place the posterior, lower part of your leg under the leg pads so that it rests just above the ankles and Achilles tendon.
2. Lie facedown so that your upper thighs lie on across the wide pad. You should be able to flex at your waist without any restrictions.
3. Flex your waist so that your torso starts perpendicular to the floor. Take a light dumbbell in each hand and lift them from the floor. In a controlled fashion, extend your back until your body is parallel to the floor. This will be your starting position for the next part of the exercise.
4. Lift the dumbbells upwards as high as possible. Keep them moving laterally to the side. At a minimum, your arms should be parallel to the floor at the top position.
5. Hold the position at the top for a count of two, then slowly lower the dumbbells back toward the floor. Keep your upper body tight with your back parallel to the floor.
6. After completing your set of 10-12 repetitions and with the dumbbells landing toward the floor, lower your upper body back to the position where the waist is flexed.
7. Place the weights on the floor and take a short rest before starting into the next set. Repeat the series by slowly raising your torso parallel to the floor and completing the next series of dumbbell lateral raises.
Try to keep your upper and lower body in a straight line. You should also avoid jerking the weight to get things going. Keep each movement slow and controlled and avoid any swinging of your torso upwards so that you do not invite injury.
If you work carefully and with smooth, strict movements, your shoulders and entire back will respond by strengthening and firming. In addition, the muscles of your middle back (between the shoulder blades) will be strengthened and toned by hyperextensions with dumbbell lateral raises.
Illustrations by William P. Hamilton, CMI
References: 1. Guo LY, Wang YL, Huang YH et al: Comparison of the electromyographic activation level and unilateral selectivity of erector spinae during different selected movements. Int J Rehabil Res 2012;35:345-351.
2. Moore, K.L. and A.F. Dalley: Clinically Orientated Anatomy 4th Edition, Lippincott Williams & Wilkins,1999, pp-432-474; 690-698.
3. Minning S, Eliot CA, Uhl TL, et al:. EMG analysis of shoulder muscle fatigue during resisted isometric shoulder elevation. J.Electromyogr.Kinesiol. 2007;17, 153-159.
4. Reinold MM, Macrina LC, Wilk KE, et al:. Electromyographic analysis of the supraspinatus and deltoid muscles during 3 common rehabilitation exercises. J.Athl.Train. 2007;42, 464-469.
5. Yoshizaki K, Hamada J, Tamai K, et al:. Analysis of the scapulohumeral rhythm and electromyography of the shoulder muscles during elevation and lowering: comparison of dominant and nondominant shoulders. J.Shoulder.Elbow.Surg. 2009;18, 756-763.7666
Тазовая область – одна из самых важных и одновременно самых уязвимых частей тела человека. Здесь расположены жизненно важные органы и системы, которые отвечают за многие функции нашего организма. А в век малоподвижного образа жизни этот вопрос может стать острой проблемой. Здесь находится большая часть кишечника, отвечающего не только за пищеварение, но и за формирование крепкого иммунитета, здоровых ногтей, красивой кожи, блестящих волос.
Лонно-крестцовая и ягодичные мышцы играют огромную роль в здоровье женщин и мужчин. Поэтому доктора рекомендуют всегда держать их в тонусе, регулярно делать упражнения, самым простым и эффективным из которых считается ходьба на ягодицах.
Для получения результата запаситесь терпением. И цель обязательно будет достигнута!
У такой зарядки нет противопоказаний. Не рекомендуется выполнять женщинам во время менструации, а также при появлении болевых ощущений в пояснице и нижней части живота (не путать с характерными болями в мышцах после выполнения упражнений).
Сядьте на ягодицы с прямыми ногами;
Тело должно располагаться перпендикулярно ногам. Ходьба на ягодицах должна выполняться с прямой спиной: постоянно следите за осанкой, старайтесь не сутулиться. Если ваша растяжка не позволяет вам сидеть прямо, обязательно потянитесь до начала упражнения;
Руки согните в локтях на 90о. Чтобы усложнить упражнение, не помогайте себе руками, а уберите их за голову;
Выдвигайте вперед правую ягодицу вместе со всей правой ногой. Во время выполнения движения старайтесь не возить ногу по полу, а держать ее на весу;
Одновременно с движением ягодицей, помогайте себе верхней частью тела, поворачивая левую часть корпуса. Старайтесь делать движения плавно, без рывков.
Во время ходьбы на ягодицах ваши «шаги» не должны быть широкими. Пусть они будут мелкими, но правильными.
Начните выполнять упражнения с 2 раз в день, двигайтесь по комнате вперед и назад. Постепенно увеличивайте количество подходов в ту и другую сторону.
Зарядку можно разнообразить «шагами» в стороны!
Эффект от упражнений не заставит себя ждать. Вы почувствуете, что ягодицы становятся подтянутыми. Худеют не только бедра, но и ноги. Задействуются нижние мышцы пресса. Ходьбой на ягодицах можно решить и проблемы со здоровьем.
Why sprint? To dominate your sport. Faster athletes are better athletes. Not an athlete? Sprints are still important. If you want to achieve blazing speed you'll have to make deliberate choices in the gym with your exercise selection. Here's what will make you faster.
1 – Hip Thrust for Horizontal Force Production
Sprint speed requires you to get stronger in the horizontal plane. Moving weight up and down (vertically) won't get you much faster.
This is where most people get it wrong. They focus on squats, lunges, deadlifts, Olympic lifts, and box jump variations to improve their sprinting and speed. All of these involve mainly vertical force production – moving a weight vertically in space while in a standing position.
Horizontal force is created when you lay down horizontally and then produce force against gravity like you would do with a hip thrust, back extension, reverse hyper or glute-ham-raise, or when you use a cable attachment like a pull-through or kick-back. Knowing that horizontal force is most important for speed might lead you to believe that the glutes and hamstrings are the most important muscles, and you're absolutely right. EMG activity and joint angular forces show that the strength of these muscles is a good predictor of speed.
Hip Thrust
Your ability to produce horizontal force is strongly tied to speed. Horizontal force production is more important then vertical forces both in acceleration and in maximal speed. Sure, there are vertical forces while sprinting because of the impact gravity has on your body, but it doesn't increase when speed increases, and faster sprinters do not show any greater ability to produce vertical force then slower sprinters. Granted, vertical exercises have their place in a balanced program, but for those who need to get faster, they shouldn't be prioritized over horizontally directed exercises.
2 – Use Unilateral Exercises
Sprinting isn't a bilateral exercise. Both feet are never on the ground at the same time. This makes unilateral training highly effective for increased speed.
Sprinting is a unilateral movement. To make exercises as specific as possible they should be performed on one leg when possible. In addition, your body's motor cortex is a lot better at producing power with just one leg at a time as opposed to both legs. By focusing on only one leg at a time, you'll get a greater activation of the muscle fibers in the muscles you're training.
Stability is a problem though. And obviously you can't perform every exercise unilaterally if you can't stay balanced. If the exercise is too difficult to do on one leg, you might end up only improving your balance instead of strengthening the muscles. Ever tried to do a single-leg squat snatch? Don't. Exercises where you're fixed in a machine and where stability isn't a concern (like reverse hypers, 45-degree back extensions, or hip thrusts) should optimally be performed on one leg.
One Legged Hip Thrust
The one-legged hip thrust is the most important exercise to be doing in the weight room. This may come as a surprise if you've been thinking the squat is the greatest exercise of all time, but it's really not. At least, not if you want to run fast.
3 – Use the Force-Velocity Curve
Train all areas of the curve... especially the ones where you're lacking.
On the right end of the curve you have speed. That base is covered by sprinting. On the upper left end of the curve is maximal strength. Increasing your maximal strength will move the entire curve up.
Think about when the foot is in contact with the ground during a sprint. Sprinting is all about creating forces at high velocities for that very short period of time. So increases in both maximal force and maximal velocity will improve this ability.
Between maximal strength and speed you'll notice three other categories: speed-strength, which you could do with plyometrics or med-ball throws. Power, which is typically Olympic lifting exercises. And strength-speed, which you can do with things like explosive squatting or glute-ham raises with 70-90% of your 1 RM.
All of these categories have a place in intelligent training, but choose wisely depending on your abilities as an athlete or lifter. If you can already squat twice your bodyweight, it may be more beneficial to work more on the speed end of the curve. If you run the 100 meter under 11 seconds, but still can't hip thrust twice your bodyweight, then you should increase your maximal strength. By doing so you'll improve your speed. Choose exercises to target different areas the force-velocity curve and zero in on your weak link.
4 – Pay Attention to Joint-Dominance
Strong hips are an indicator of speed. Prioritize hip-dominant exercises.
Prioritize exercises involving the hip joint. The hips are the largest contributor to the increased power output. And world-class sprinters are able to produce more force here than slower sprinters.
This doesn't mean you should only do hip dominant exercises. It means putting them at the beginning of your workout and using a higher total training volume here than on the other movements. Yes, train other lower body joints; they're important too. The knee is the second largest contributor to forces needed for increased speed. Finally, the ankle joint plays a smaller but still significant role. Plan your hip-dominant exercises first, then do knee dominant exercises.
Let's say you have the choice between squats, walking lunges, or one-legged hip thrusts. Out of the three, the one-legged hip thrust is the only horizontal exercise. Both the squat and the walking lunges are knee dominant movements. The hip thrust, on the other hand, is hip dominant and if we could only choose one out of the three we know from the principle of joint priority that loading the hip joint will be most effective.
5 – Think About Muscle Length When Lifting
The main muscles you use are either lengthened or shortened when you're sprinting. Choose the lifts that have the same (long vs. short) characteristics.
The hip joint extends the leg down and backwards to propel the body forward. The main muscles responsible for this movement are the glutes and the "biarticular" hamstrings. Biarticular refers to the three out of four hamstring muscles that move both the hip joint and the knee joint.
When the foot touches the ground, the knee is almost fully extended and the foot is directly or slightly in front of the body's center of mass. At this point, the hamstring is functioning at a relatively long muscle length, and from there on, the hamstring will both extend the hip joint and flex the knee joint through the stance phase. The glutes, on the other hand, function at a much shorter muscle length when the foot touches the ground throughout the stance phase.
This is important to know because a strength training exercise tends to have a point where the movement is easiest and a point where it's hardest – like when some lifters fail their squats out of the bottom position or just above parallel. Both squats and lunges are hardest in the bottom position where the glutes are stretched and the hamstrings are relatively short because of the bended knee. Here, the glutes are functioning at a long muscle length while the hamstrings are functioning at a relatively short muscle length. This is completely opposite of the muscle lengths we see in sprinting. They'll leave the muscles trained in the squat under-stimulated at the lengths that are relevant.
On the other hand, a hip thrust will usually be hardest at the top lockout position for most people, and will therefore stimulate the muscles at a length that's relevant for sprinting. The glutes will be functioning at short muscle lengths just like you'd want them to. The same goes for reverse-hypers and the flat back extension.
Romanian Deadlift
To stimulate the hamstring at same lengths as they are functioning at while sprinting, try using the Romanian deadlift or the 45-degree back extension as opposed to standing leg-curls or the Nordic hamstring exercise.
6 – Use the Stretch-Shortening Cycle
An exercise is more effective if it involves a stretch-shortening cycle.
Numerous studies have shown increased power when an eccentric movement is directly followed by a concentric movement. A stretched muscle is able to store elastic energy in the eccentric (lengthening/lowering) phase and then release it in the concentric (shortening/lifting) phase to create a more powerful movement. This is because of the stretch shortening cycle.
This is exactly what happens in sprinting when you explosively push your knee up and forward through the swing phase. You stretch the glutes and hamstring close to their maximal range of motion and benefit from the increased contraction of these muscles through the stance phase.
Exercises involving both an eccentric and a concentric contraction will be more beneficial than purely eccentric or concentric exercises. The squat and the hip thrust both involve the stretch-shortening cycle while walking lunges only do so to some extent. The eccentric part of the walking lunge involves different muscle activity than the concentric, thus making the body unable to fully benefit from the stretch shortening cycle. Backward lunges will fix this problem.
As for hip thrusts, don't reset the bar on the ground between each rep. Start each rep from the top, lower slowly, then powerfully lift the bar back up with your glutes.
Mann, Ralph. The mechanics of sprinting and hurdling. CreateSpace, 2011.
Buchheit, M., Samozino, P., Glynn, J. A., Michael, B. S., Al Haddad, H., Mendez-Villanueva, A., & Morin, J. B. (2014). Mechanical determinants of acceleration and maximal sprinting speed in highly trained young soccer players. Journal of sports sciences, 32(20), 1906-1913.
Funato, K., Yanagiya, T., & Fukunaga, T. (2001). Ergometry for estimation of mechanical power output in sprinting in humans using a newly developed self-driven treadmill. European journal of applied physiology, 84(3), 169-173.
Morin, J. B., Edouard, P., & Samozino, P. (2011a). Technical ability of force application as a determinant factor of sprint performance. Medicine & science in sports & exercise, 43(9), 1680-1688.
Morin, J. B., Bourdin, M., Edouard, P., Peyrot, N., Samozino, P., & Lacour, J. R. (2012). Mechanical determinants of 100-m sprint running performance. European journal of applied physiology, 1-10.
Kawamori, N., Nosaka, K., & Newton, R. U. (2012). Relationships between ground reaction impulse and sprint acceleration performance in team-sport athletes. The Journal of Strength & Conditioning Research, 27(3): 568-73.
Lockie, R. G., Murphy, A. J., Schultz, A. B., Jeffriess, M. D., & Callaghan, S. J. (2013). Influence of sprint acceleration stance kinetics on velocity and step kinematics in field sport athletes. The Journal of Strength & Conditioning Research, 27(9), 2494-2503.
Morin, J. B., Slawinski, J., Dorel, S., Couturier, A., Samozino, P., Brughelli, M., & Rabita, G. (2015). Acceleration capability in elite sprinters and ground impulse: Push more, brake less?. Journal of biomechanics.
Mero, A. (1988). Force-time characteristics and running velocity of male sprinters during the acceleration phase of sprinting. Research Quarterly for Exercise and Sport, 59(2), 94-98.
Kyröläinen, H., Komi, P. V., & Belli, A. (1999). Changes in muscle activity patterns and kinetics with increasing running speed. The Journal of Strength & Conditioning Research, 13(4), 400-406.
Funato, K., Yanagiya, T., & Fukunaga, T. (2001). Ergometry for estimation of mechanical power output in sprinting in humans using a newly developed self-driven treadmill. European journal of applied physiology, 84(3), 169-173.
Nummela, A., Keranen, T., & Mikkelsson, L. O. (2007). Factors related to top running speed and economy. International Journal of Sports Medicine, 28(8), 655-661.
Brughelli, M., Cronin, J., & Chaouachi, A. (2011). Effects of running velocity on running kinetics and kinematics. The Journal of Strength & Conditioning Research, 25(4), 933.
Munro, C. F., Miller, D. I., & Fuglevand, A. J. (1987). Ground reaction forces in running: a reexamination. Journal of biomechanics, 20(2), 147-155.
Kyröläinen, H. K., Belli, A., & Komi, P. V. (2001). Biomechanical factors affecting running economy. Med Sci Sports Exerc. 33(8): 1330-7.
Kyröläinen, H., Avela, J., & Komi, P. V. (2005). Changes in muscle activity with increasing running speed. Journal of sports sciences, 23(10), 1101-1109.
Belli, A., Kyröläinen, H., & Komi, P. V. (2002). Moment and power of lower limb joints in running. International journal of sports medicine, 23(2), 136.
Schache, A. G., Dorn, T. W., Blanch, P. D., Brown, N. A., & Pandy, M. G. (2012). Mechanics of the human hamstring muscles during sprinting. Medicine & Science in Sports & Exercise, 44(4), 647-658.
Weyand, P. G., Sternlight, D. B., Bellizzi, M. J., & Wright, S. (2000). Faster top running speeds are achieved with greater ground forces not more rapid leg movements. Journal of Applied Physiology, 89(5), 1991-1999.
Beneke, R., & Taylor, M. J. (2010). What gives Bolt the edge-AV Hill knew it already!. Journal of biomechanics, 43(11), 2241-2243.
Miller, R. H., Umberger, B. R., & Caldwell, G. E. (2012a). Limitations to maximum sprinting speed imposed by muscle mechanical properties. Journal of biomechanics, 45(6): 1092-7.
Miller, R. H., Umberger, B. R., & Caldwell, G. E. (2012b). Sensitivity of maximum sprinting speed to characteristic parameters of the muscle force-velocity relationship. Journal of biomechanics, 45(8), 1406-1413.
Mann, R., & Sprague, P. (1983). Kinetics of sprinting. Track and Field Quarterly Review, 83(2), 4-9.
Mann, R. V. (1981). A kinetic analysis of sprinting. Med & Science in Sports & Exercise, 13(5), 325-8.
Bezodis, I. N., Kerwin, D. G., & Salo, A. I. (2008). Lower-limb mechanics during the support phase of maximum-velocity sprint running. Medicine and science in sports and exercise, 40(4), 707.
Bezodis, I. N., Salo, A. I., & Kerwin, D. G. (2009). Athlete-specific analyses of leg joint kinetics during maximum velocity sprint running. Proceedings of the XXVII International Conference on Biomechanics in Sports.International Society of Biomechanics in Sports, pp. 378-381.
Schache, A. G., Dorn, T. W., Blanch, P. D., Brown, N. A., & Pandy, M. G. (2012). Mechanics of the human hamstring muscles during sprinting. Medicine & Science in Sports & Exercise, 44(4), 647-658.
Contreras, B. M., Cronin, J. B., Schoenfeld, B. J., Nates, R. J., & Sonmez, G. T. (2013). Are All Hip Extension Exercises Created Equal? Strength & Conditioning Journal, 35(2), 17-22.
Simpson, K. J., & Bates, B. T. (1990). The effects of running speed on lower extremity joint moments generated during the support phase. International Journal of Sport Biomechanics, 6, 309-324.
Kuitunen, S., Komi, P. V., & Kyröläinen, H. (2002). Knee and ankle joint stiffness in sprint running. Medicine and science in sports and exercise, 34(1), 166.
Schache, A. G., Blanch, P. D., Dorn, T. W., Brown, N. A., Rosemond, D., & Pandy, M. G. (2011). Effect of running speed on lower limb joint kinetics. Medicine and science in sports and exercise, 43(7), 1260.
Chumanov ES, Heiderscheit BC, Thelen DG. (2007).The effect of speed and influence of individual muscles on hamstring mechanics during the swing phase of sprinting. Journal of Biomechanics, 40: 3555-3562.
Guex, K., Lugrin, V., Borloz, S., Millet, G. P., & de Beaumont, A. (2015). Influence on strength and flexibility of a swing phase-specific hamstring eccentric program in sprinters general preparation. Journal of strength and conditioning research.
McNeely, E. (2005). Introduction to plyometrics: Converting strength to power. NSCA's Performance Training Journal, 6(5), 19-22.
Cavagna, G. A. (2006). The landing-take-off asymmetry in human running. Journal of experimental biology, 209(20), 4051-4060.
Roberts, T. J. (2002). The integrated function of muscles and tendons during locomotion. Comparative Biochemistry and Physiology-Part A: Molecular & Integrative Physiology, 133(4), 1087-1099.
Meylan, C., McMaster, T., Cronin, J., Mohammad, N. I., & Rogers, C. (2009). Single-leg lateral, horizontal, and vertical jump assessment: reliability, interrelationships, and ability to predict sprint and change-of-direction performance. The Journal of Strength & Conditioning Research, 23(4), 1140-1147.
Habibi, A., Shabani, M., Rahimi, E., Fatemi, R., Najafi, A., Analoei, H., & Hosseini, M. (2010). Relationship between Jump Test Results and Acceleration Phase of Sprint Performance in National and Regional 100m Sprinters. Journal of Human Kinetics, 23(1), 29-35.
Robbins, D. W., & Young, W. B. (2012). Positional Relationships Between Various Sprint and Jump Abilities in Elite American Football Players. The Journal of Strength & Conditioning Research, 26(2), 388.
Holm, D. J., Stålbom, M., Keogh, J. W., & Cronin, J. (2008). Relationship between the kinetics and kinematics of a unilateral horizontal drop jump to sprint performance. The Journal of Strength & Conditioning Research, 22(5), 1589-1596.
Ramírez-Campillo, R., Burgos, C. H., Henríquez-Olguín, C., Andrade, D. C., Martínez, C., Álvarez, C., & Izquierdo, M. (2015). Effect of Unilateral, Bilateral, and Combined Plyometric Training on Explosive and Endurance Performance of Young Soccer Players. The Journal of Strength & Conditioning Research, 29(5), 1317-1328.
Speirs, D. E., Bennett, M., Finn, C. V., & Turner, A. P. (2015). Unilateral vs Bilateral Squat training for Strength, Sprints and Agility in Academy Rugby Players. Journal of Strength & Conditioning Research.
This week, some of the baddest mofos on planet Earth will descend upon Indianapolis for one reason:
To show just how bad ass they are!
The NFL combine has become not only an awesome event for pro teams and scouts to evaluate potential talent and draft pics, but one of the coolest spectator sports for geeks like me to watch at home!
But before I get ahead of myself, let’s start with a brief overview of what the NFL combine is.
What is the NFL Combine?
The NFL combine is a series of tests to determine how athletic a potential draft pick is.
While NFL scouts have spent hundreds (if not thousands) of hours reviewing tape on specific players, sometimes it’s hard to tell what kinds of raw materials you’re working with.
Consider this – in the NFL you should (theoretically) have the best football coaches in the world.
The key, then, would be to find some of the best athletes possible to hone and develop their skills. You could have the smartest football player known to man, but if they’re jump 20 inches or running a 5.5 second forty, they simply aren’t going to be successful at this level!
The combine allows NFL scouts and coaches to see a ton of high-level prospects over the course of 4-5 days.
The NFL Combine Tests
As mentioned above, there are six tests that everyone goes through in the NFL combine:
The 40-yard dash,
Pro agility,
3-cone drill,
Vertical jump,
Broad jump, and
The 225-bench press repetition test.
Below, we’ll examine each test in depth so you have a better understanding of not only how to perform the test, but what it’s actually measuring.
The 40-Yard Dash
Performing the 40-Yard Dash
The 40-yard dash is the simplest NFL combine test to understand.
The athlete will approach the starting line and crouch in their starting position. They have to hold this position for two seconds, before exploding out and running straight ahead for 40-yards.
Here is a short video of Chris Johnson (running back for the Tennessee Titans) who is on record with the fastest 40 time ever, clocking in at a blazing 4.24 seconds.
What does the 40-yard dash test?
The 40-yard dash by itself is a great measure of overall speed. And along those same lines, someone that is running a very fast 40 with little training probably has a very elite nervous system, which is nearly impossible to develop.
However, as you’ll see in the adjacent picture there are timing lights at the 10, 20, and 40-yard line. If we break the test down, it may look something like this:
10-yard dash – Big body lean, “acceleration” mechanics, and quad/glute strength and power
20-yard dash – More upright position, blend between “acceleration” and “top-speed” mechanics, and quad/glute/hamstring strength and power.
40-yard dash – Upright position, “top-speed” mechanics, and glute/hamstring strength (think of “pulling” versus “pushing)
Many football purists would say that you rarely, if ever, run 40-yards straight ahead in a game and that this test isn’t specific to the game.Instead, the game is played in a 5-to-10 yard box, and the ability to make a decision, plant and cut quickly are far more specific to the actual game.
If you’re looking at a composite score of all the tests, we have to remember that the 40-yard dash is just one test. However, the fact that’s it’s easily understood (and easy for coaches and scouts to fall in love with!) is both a blessing and a curse.
Notes from Nick Winkelman, Combine Speed Development Coach, EXOS
“The 40 yard dash provides a 3-component profile of an athletes linear speed. The components include:
The start/acceleration zone (0-10 yards),
transition/max velocity zone (10-25 yards), and
max velocity/speed endurance zone (25-40 yards).
The start/acceleration zone of the race provides an indication of the athlete’s overall relative and explosive strength characteristics in addition to being a strong indicator of horizontal jumping capabilities.
By 10 yards athletes are transitioning from acceleration mechanics (i.e. aggressive lean with piston-like leg drive) to max velocity mechanics (i.e. upright posture with cynical leg action).
The transition/max velocity zone is the most neurologically demanding as stride frequencies approach 5 contacts per second. This zone is a measure of an athletes overall reactive strength and provides a good indication of vertical jumping capabilities.
Finally, the max velocity/speed endurance zone provides an indication of the athlete’s maximal velocity capabilities as athletes will achieve 85-100% of their true maximal velocity by this point in the race. (Note: The best 40 times are achieved in less than 21 steps).
However, in heavier athletes who do not have elite sprint capabilities (ex. lineman) this zone will provide an indication of their speed endurance and their overall capacity to maintain maximal velocity over the last 10-15 yards.”
Training for the 40-Yard Dash
If your goal is to run a faster 40, you need to start by breaking the test down into bite-sized pieces.
In other words, you don’t just go out and run 40’s every day and hope that your 40 time drops!
It might (especially if you’ve never trained specifically for the 40), but there are far more sophisticated ways to go about this. A typical 40-yard dash program may include any (or all) of the following:
Priming the start. Quite simply if you get out of the gate slow, you’re not going to run your best time. Working on the set-up and start (repeatedly!) to explode out of the box is critical to running a faster 40.
Acceleration mechanics. Whether it’s wall drills, pushing a Prowler, etc., the goal is to get a great forward lean so that you can really drive the first 10 to 20 yards.
Lots of 10’s and 20’s. The 10 and the 20 set-up the 40. Again if you’re slow out of the gate, or if you transition from acceleration to top-end mechanics too quickly, you won’t run your best time.
And then, finally, 40’s. At some point, you need to practice the actual test. The other skills and drills give you a foundation, but once you have that foundation you need to cement it and work on finishing the race.
Pro Agility (aka 5-10-5 or 20-yard shuttle)
Performing the Pro-Agility Drill
The pro-agility drill starts with the athlete in a crouched position, in between two cones which are 10-yards apart. The test goes as follows:
From the crouched position, the athlete explodes to the right and touches the line with his right hand,
He explodes out of this cut and sprints 10 yards, touching the line with his left hand, and then
Explodes back through the middle cone.
After a short break the test is the repeated, but starts by going to the left first.
The fastest record pro agility drill was by Jason Allen, who put up a ridiculously fast time of 3.81 seconds. Here’s how the test looks in real-time:
What does the pro-agility drill test?
The pro-agility drill is a great test of multi-directional speed and agility.
As I noted above, it’s rare that you get to crank it up and run 40 yards in a straight line. Instead, football (and field/court sports) forces you to accelerate, decelerate, plant and then cut, and accelerate in a different direction.
In this way, the pro-agility drill is a great overall measure of an athletes ability to change direction.
If you want to be great at this test, you’ll need a few specific physical traits:
Explosive strength and power in the hips and thighs,
Eccentric strength (especially laterally) in the above muscle groups, to help you load and explode out of the cuts, and
Stability and control in the foot, knee, hip, and core. More stability = more control in and out of cuts.
The downside to this test is the fact that it’s a rehearsed drill. In a live game, you have to make a decision and then react in any number of ways, so there isn’t the same level of cognitive function.
Notes from Pete Bommarito, Bommarito Performance
“The shuttle run for the NFL combine focuses on and tests several critical components of athleticism:
Lateral power at the start,
Which transitions into lateral speed,
180 degree changes of direction, and finally
Linear speed.
In our training we not only use power exercises but bounding and carioca stepping as well. These not only build athleticism, but also transfer well to the shuttle run.”
Training for the Pro Agility Drill
If you want to shed time from your pro-agility drill, here are a handful of things you can work on or address:
Drill the start. The lateral push can be challenging for some, as it’s not as natural as the forward push in a 40. It may help to think “quick hands” or to “get the hands” moving to get more push from the hips and legs.
Deceleration mechanics. If you’re slow in and out of the cuts, this test is going to eat you alive. To fix this, work on quality deceleration mechanics, such as getting the core/trunk stiff and setting a hard edge with the foot.
Quick cuts. As important as it is to have good mechanics coming into cuts, you also have to work hard to explode back out of the cut. Don’t just use the feet – think about using the eyes and torso to drive back in the opposite direction.
Put it all together. Just like any test, after you’ve broken the drill down into its constituent parts, you have to put it all back together.
The 3-Cone Drill (aka L-Drill)
Performing the 3-Cone Drill
The 3-cone drill is the most complex of the combine drills. Here’s how it plays out:
The cones are put in an “L” shaped formation, with each cone 5 yards apart.
The athlete starts in a crouched position, and explodes to the cone directly in front of him.
Next, the athlete turns and goes back, touching the line of the starting cone.
From here, the athlete heads back to the front cone, and performs a 90 degree cut to the left or right.
The athlete goes to the inside of this cone, and curls around (essentially performing a 180 degree cut).
The athlete finishes by going around the outside of the 1st cone, and then sprints through the finish line.
The fastest 3-cone drill was performed by Jeffrey Maehl, at 6.42 seconds. While there’s no video of Jeffrey’s test, here’s one of Joe DeFranco’s athletes running a very fast 3-cone drill.
What does the 3-Cone Drill test?
The 3-cone drill is similar to the pro-agility drill, in the fact that an athlete has to explode for 5 yards, and then turn on a dime and go back in the opposite direction.
However, what’s unique about the cone drill is the second component of this test. The 90- and 180-degree turns are far more similar to what you might see in a football game.
At its core, the cone drill looks at acceleration, deceleration, and change of direction in a multitude of ways. If you want to be good at this drill, you’ll need to address the following:
Explosive strength and power in the hips and thighs,
Multi-planar eccentric strength in the above muscle groups, to help you load and explode out of the cuts,
Stability and control in the foot, knee, hip, and core. More stability = more control in and out of cuts.
Notes from Nick Winkelman, Combine Speed Development Coach, EXOS
“The 3-cone or L-drill provides an strong indication of an athletes ability to move in space.
The first two 180 degree right-side cuts provide an indication of an athlete’s change of direction capabilities. Each cut has to be executed in a fraction of a second which demands an ability to to rapidly flex through the hips, knees, and ankles while expressing high levels of relative and reactive strength to get off the lines.
The second half of the drill demands 90-180 degree turns and provides an indication of high speed cutting and body control. If the athlete doesn’t use their eyes and body position to guide their footwork on the ground then the times will be slow.
Finally, once the athlete has navigated the final cone then they have to run an arching 12 yard sprint. This last element is a reinforcement of the athletes ability to accelerate on a curvilinear path which is often the case when navigating traffic on the football field.”
Training for the 3-Cone Drill
The cone drill can be a challenging, as there’s a ton going on. Again, it helps to break the test down into more manageable bits and pieces:
Explode to the first cone. Like all of these tests, a slow start is the kiss of death. Work to explode off both legs and get to that first cone in 2.5-3 steps.
Tight in the 180’s. If you’re drilling the pro-agility, you may not have to work too hard on this in it’s own right. However, work to get clean 180-degree cuts, and set a hard edge with the foot to explode out from.
Short and choppy in the 90’s and 180’s. There’s definitely a happy medium on the second half of the drill – you don’t want to take a ton of steps to round the cone, but you don’t want to take a thousand either. Work to find that happy medium that allows you to make tight, consistent turns.
Sprint and lean. The final stretch is essentially a 10-yard arcing run. Again you’ll have to chop the steps up a bit, but perhaps more importantly, work to lean into that final turn so that you can finish strong and fast.
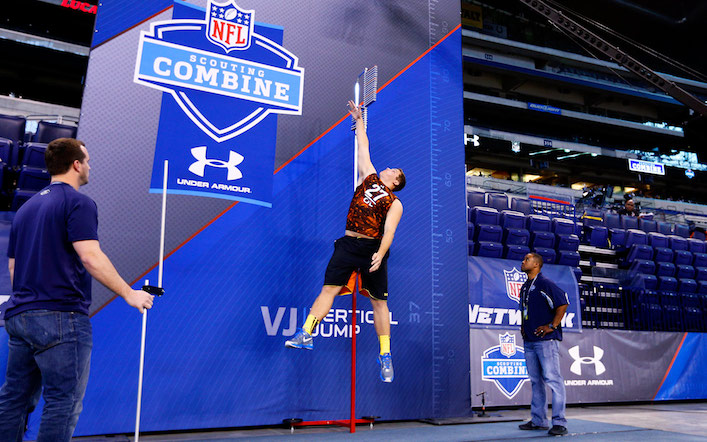
The Vertical Jump
Performing the Test
The vertical jump test (like the 40) is pretty darn easy to understand.
Prior to jumping, the coach/scout working the station will get a vertical reach for the athlete. The athlete will stand tall and reach their arms as high as possible overhead. The measurement runs from the ground up to the top of their middle finger.
Once their reach has been measured, the athlete will stand underneath an apparatus called a Vertec, which is essentially a column with little sticks poking out to the side.
The athlete will reach up high, then rapidly descend and explode straight up, attempting to touch the highest stick possible. The best vertical jump to-date was set by Donald Washington in 2009, where he soared a whopping 45 inches!
The below video is a great example of technique, too. Watch how the athlete “swats” at the sticks on his first attempt. As I’ll describe below, you don’t need to do that!
What Does this Test Look At?
The vertical jump looks primarily at explosive/reactive strength in the hips and thighs (more so in the anterior chain). Another way to look at the test is the vertical jump is a great indicator of an athlete’s ability to display vertical power.
While it’s not as multi-layered as some of the other tests, the vertical jump is a great indicator for raw or natural athleticism and a “fast” nervous system.
Notes from Pete Bommarito, Bommarito Performance
“The vertical jump is a great test of lower body power, and specifically, vertical power.
Vertical power is the most basic form of power expression, and our goal is to develop general power first and foremost. Once you have general power, then you can work on developing or converting that into a more sport- or game-specific style.”
Training for the Test
How you train for the vertical jump test is largely dependent upon what kind of athlete you are training. It may help to think of a spectrum; on one end you have the fast, springy athlete and on the opposite side you have the slower, stronger athlete.
The fast, springy guy is already reactive and can use his connective tissue and stiffness to be explosive. In this case, your time would be best spent getting this guy stronger in the weight room. I’d tend to spend my time on lifts that hit the anterior chain hard, like squats.
On the other hand, the strong, slow athlete would benefit more from learning how to be reactive. This athlete should spend time working on jumping variations (landing on a box to eliminate eccentric stress), med ball throws, Olympic lift variations, etc. The goal here is to harness that strength and teach them to express it more rapidly, which will help them jump higher.
Last but not least, here are a few quick notes on performing the actual test:
Think about having quick arms. If you think too much about the legs, it will slow you down and decrease performance. Let the quick arms drive the legs.
“Just a little tap.” Channeling my inner Happy Gilmore here, you don’t have to swat at the sticks. This will actually decrease your touch height. Instead, think about reaching as high as possible and gently tapping the stick instead.
The Broad Jump
Performing the Test
The broad jump is another very simple test. In this case, the athlete will stand at the starting line, dip quickly with the hips and thighs, and then explode as far forward as possible.
One key to the broad jump test is that the athlete must stick the landing. The best broad jump on record is from Jamie Collins, who jumped 11 feet and 7 inches. Here’s a clip of him jumping:
What Does this Test Look At?
The broad jump is similar to the vertical jump, in the fact that it’s a great representation of total body power and explosiveness. However, there are a few key distinctions here:
The vertical jump is focused more on the anterior chain (i.e. quads), where as the horizontal jump is focused more on the posterior chain (glutes and hamstrings).
The vertical jump expresses vertical power and explosiveness, while the broad jump is focused on horizontal power.
Last but not least, the athlete is forced to “stick” the landing in the broad jump.
Therefore, while the vertical jump may be the more popular test, the broad jump may be a better indicator of how explosive an athlete is on a football field.
Notes from Chip Morton, Strength & Conditioning Coach, Cincinnati Bengals
The Standing Broad Jump is a test used to measure leg strength & power via distance covered in the horizontal plane.
The athlete is instructed to assume a position with their toes behind the line. When the athlete is set, he jumps horizontally, taking off from both feet on his own command. The distance jumped is recorded from the start line to the point of heel contact.
An important performance point in the Broad Jump is the ability of the athlete to “stick” the landing, a great indicator of an athlete’s eccentric strength or ability to decelerate. Proficiency in the Standing Broad Jump is highly correlated with sprinting ability as measured by 10-, 20-, & 40 yd. sprints (1).
Training for the Test
While there’s more room for interpretation in how to prepare for the vertical jump, in my opinion, the broad jump is a bit more straight ahead (no pun intended).
Quite simply, if you want a big broad jump, you need to build a strong backside. This is done in the weight room, and then expressed when jumping. A few quick notes:
The program should be built around posterior chain exercises: Deadlifts, RDL’s, and the like. This is why powerlifters often have awesome broad jumps, without any specific training.
Much like the vertical jump, think about having quick, choppy arms. Allow the arms to drive the legs.
Last but not least, make sure to do some specific training on the jumps, with a big emphasis on the landing. This is a different animal from the vertical jump in this regard, so don’t lose precious inches because you haven’t worked on sticking the landing.
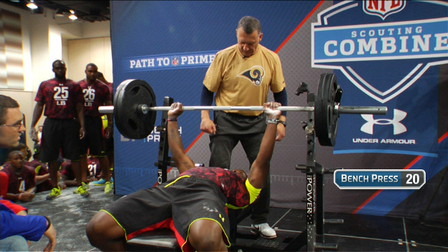
225-Bench Press Repetition Test
Performing the 225-Bench Press Test
The 225-bench press test is the final test in the Combine, although it’s typically performed first on the actual test day.
The athlete will lie on their back, unrack the bar, and bench press 225-pounds as many times as possible. Here are a few things that the judge will be looking for:
The hips must stay on the bench (i.e. you can’t lift the hips or “thrust” the weight up with your lower body),
You must lock out the elbows at the top of the lift, and
You can take a breath or pause at the top in between reps.
Stephen Paea has the current record in the 225-bench press test, cranking out an astonishing 49 reps!
What Does the 225-Bench Press Test look at?
The 225-bench press test isn’t an ideal test for football players, as it looks more at strength or power endurance, versus pure strength or power.
Think about it like this: How often is an athlete required to repeatedly press something (or push something/someone) for 30, 45 or up to 60 seconds in a football game?
I’ll tell you the answer: Never.
However, the test is what it is, and at the very least you have a general idea of an athletes upper body strength, power and endurance as a result.
If your goal is to dominate a bench press rep test, here are the physical qualities you’ll need:
Maximal strength in the upper body – namely the chest, shoulders and triceps,
Once base strength is built, then strength endurance will be laid on top.
The bottom line is you want/need to get strong first.
Consider this – who is going to rep 225 more – the guy who can bench press 250 pounds? Or the guy who can bench press 350 pounds?
It’s a no-brainer.
But at the same time, you can’t focus on maximal strength while excluding either the skill or endurance side of the equation. Both are important, but should be focused on towards the end of the program.
Notes from Pete Bommarito, Bommarito Performance
“The 225-bench test at the NFL Combine is a pure test of strength endurance. It’s definitely not a test of pure or maximal strength, but it’s a safe weight that they can use from year-to-year to compare prospects.
Even though some people have issue with the test, strength endurance is still an important quality for athletes to possess.”
Training for the 225 Bench Press Test
How you train for the 225-bench press test is really dependent upon how long you have to train.
Ideally, you have several months to prepare. This will allow for an accumulation phase, one (or more) maximal strength phases, and then you can finish off with an endurance and test-specific phase.
If you’ve only got 8 weeks (as you do in most combine-prep programs), it may look more like this:
Weeks 1 & 2 – Accumulation and work capacity,
Week 3, 4 & 5 – Maximal strength, and
Weeks 6, 7 & 8 – Strength endurance and taper.
The focus during each block would be on pressing power in the chest, shoulders and triceps. Depending on where an athlete misses or fatigues, you could also throw in any number of assistance exercises to build up weak or lagging areas.
Skill-Specific Tests
The combine is finished off by athletes performing skill or position specific tests.
Quarterbacks throw and demonstrate their footwork.
Wide receivers run routes and catch balls.
While this may be the least focused on aspect of the combine, it helps give a better representation of how an athlete looks and moves on the football field, as these drills are unrehearsed and/or more reactive in nature.
Why Did I Write All This?
Now I’m sure some of you are reading this and thinking to yourself:
Why in the heck did Mike write all this out?
The reason I’m so interested in the combine these days is because I’m currently training a young man who will be doing a pro-day in March.
If you’re unfamiliar with the term, a “pro-day” consists of all the same tests as the NFL combine, but it’s for athletes that aren’t considered blue-chip prospects. Think of it as a minor-league combine.
So for the last five months I’ve been learning everything possible about the training and testing for the combine tests to give this young man the success he deserves. He’s a phenomenal football player on the field, so my job is to give him the athletic “resume” necessary to get him looked at by professional teams.
Initially, I wasn’t sure how to feel about the series of tests – after all, they’re rehearsed drills, and they don’t necessarily reflect someone’s ability to be a successful football player.
But then my competitive juices kicked in.
It’s kind of like powerlifting – you can complain about certain elements of the sport all you want, but at the end of the day, you either got better or you didn’t.
That’s what I’ve enjoyed about this process. At the end of the day, either our training will be a success and he’ll hit new personal bests in his respective tests, or he won’t.
I’m banking on the former, but I’ll wait until his pro-day before I say anything further
Regardless, this has been not only an amazing learning experience, but a really fun challenge as well. Hopefully he kicks ass and I get the chance to refine my process with more athletes in the future.
Summary
So there you have it – a massive overview not only on the NFL combine, but some key tips and tricks to help you improve your athletic performance and development.
I sincerely hope you enjoyed the post, and make sure to either watch (or record) the combine. It’s going to be an awesome couple of days!
All the best
MR
Our Experts
Nick Winkelman, MSc, CSCS*D, USATF Director of Movement (Combine Speed Development Coach) EXOS (Phoenix, AZ) @nickwinkelman and @TeamEXOS
1. McGee, Kimberly J. and Burkett, Lee N. “The National Football League Combine: A Reliable Predictor of Draft Status?”, Journal of Strength & Conditioning Research, 2003, 17(1), 6-11